Thanks for choosing BeyondAdmin
If you have any questions that are beyond the scope of this help file, please feel free to email via my user page contact form here. Thanks so much!
BeyondAdmin App Folder Structure
    .
    ├── assets
    |   ├── css/                        --> All stylings are located here
    |       ├── beyond-less/            --> Styles related to main app
    |       ├── bootstrap-less/
    |       └── bootstrap-rtl-less/
    |       └── other-less/             --> All third party less libraries
    |       └── skins/                  --> Skins
    |   └── fonts/
    |   └── img/
    |   └── js/                         --> All JavaScript Libraries
    |   └── sound/
    |   └── swf/
    ├── upload                          --> Upload folder for file uplaod and editor purposes
Markup Structure
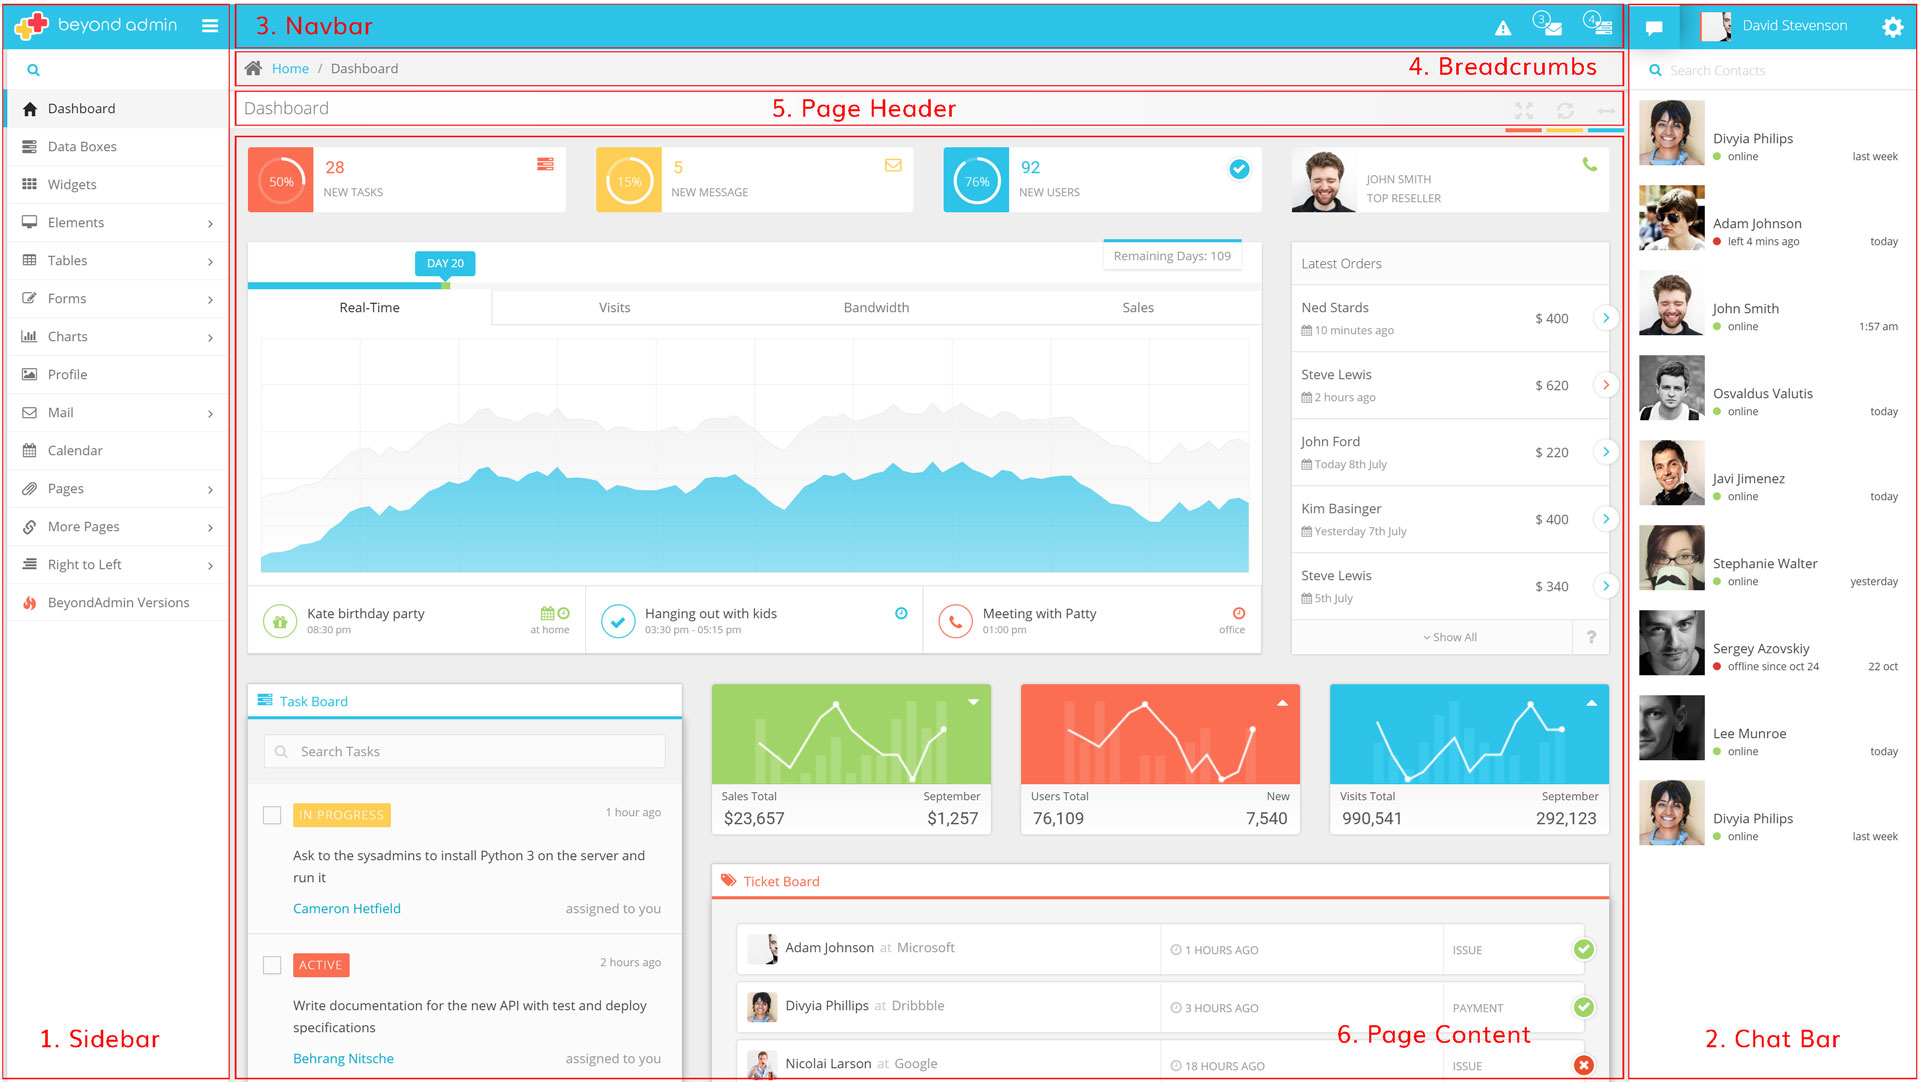
BeyondAdmin general layout is shown here. There are five main containers in the layout.
1. The sidebar's menu content is within a div with "page-sidebar" class.
2. Chatbar with "page-chatbar" class.
3. Navbar
4. Breadcrumbs
5. Page Header
6. Page Content
You can find detailed information about each of this sections and how to manipulate those in your project below:
General Markup
The general template structure is the same throughout the template. Here is the general structure.
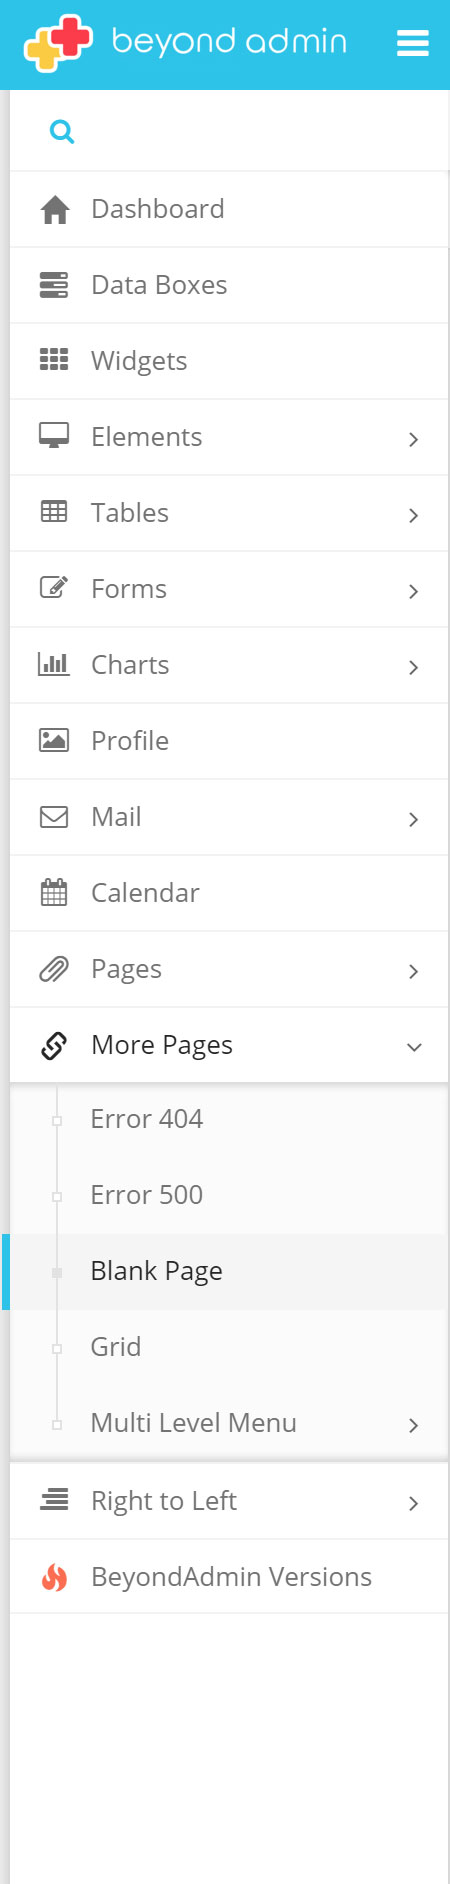
SideBar Menu
Sidebar menu structure is shown here:
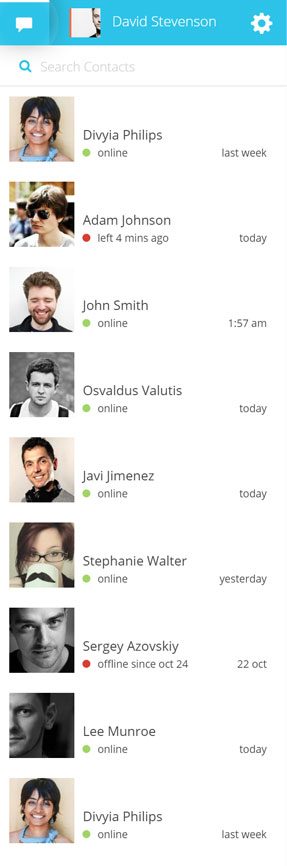
Chatbar
Chatbar enables you to add dynamic chat view to your application.

Navbar
In Navabr area you have controll to configurations, actions and User Settings.

Breadcurmbs
Breadcrumbs is very simple and similar to bootstrap default breadcrumbs. You can add any icons that you want to your pages links.

Page Header
As you can see, Header is consisted of two main parts:
- Page Title
- Header Actions
Styling of BeyondAdmin
Color Palette
Here's the color palette of BeyondAdmin.
-
danger#d73d32
-
success#53a93f
-
warning#f4b400
-
info#57b5e3
Skin Colors
These are default skins that are added to BeyondAdmin. You can add or modify this skins as you wish. All skins are places in skin folder in following address:
/assets/css/skins
-
Green
-
Teal
-
Azure
-
Blue
-
Dark Blue
-
Deep Blue
-
Orange
-
Dark Red
-
Pink
-
Purple
-
Gray
-
Black
Stylesheets
Here's a list of the stylesheet files we are using with this template, you can find more information opening each file:
| File Name | Description |
|---|---|
| bootstrap.min.css | minified of latest bootstrap css file. must be included in all pages. |
| bootstrap.min.css | RTL version of Bootstrap. find more information here. |
| animate.min.css | A bunch of cool, fun, and cross-browser animations. find how to customize here. |
| beyond.min.css | Main application css. All layouts and parts css are centered in this file. Learn how to customize. |
| beyond-rtl.min.css | Main application css in RTL. |
| demo.min.css | Remove this from your application. it is only for demo purpose and is removed from Seed project. |
| font-awesome.min.css | If you intend to use FontAwesome icon fonts in your project, this file must be present. Otherwise you can remove it. |
| typicons.css | Typicons icon fonts. |
LESS Structure
The app.less file contains all of the specific stylings for the template. The file is separated into sections. Each section contains related LESS files:
-
General Mixins:
We used LESS Hat 3.0 as our mixin library. For building the LESS files you must include lesshat and other mixins in first section. -
Helper Classes:
Helper classes for simpler developement. See what is inside! -
Page Components:
Styles for general layout of the BeyondAdmin. Do not remove these LESS files before the build. -
UI Elements:
All bootstrap css components are implemented in this section. Feel free to remove each component that you don't need. -
Forms:
All Form components are implemented in this section. Feel free to remove each component that you don't need. -
Pages, Widgets and errors:
All other components, third party and pages styling are placed in other sections. If you do not use a plugin or don't include a page remove it's LESS and rebuild the app.less. It will reduce the css file size drastically.
How to Build LESS Files
After customizing your LESS files you need to compile app.less to get css files for using in your site. Here are some common ways of compiling LESS files:
Using Visual Studio
- Install Web Essentials and just save the
beyond.less - Web Essentials uses NodeJS to run the compiler. It's the fastest and most accurate compiler for LESS available.
- When a LESS file is compiled, it can now also be minified to produce a much smaller CSS file.
Using node.js
- Install node.js
- Install the LESS compiler:
npm install -g less - Run the LESS compiler on your LESS source to produce CSS:
lessc beyond.less > app.css
Using Sublime Text
- Install node.js
- Install the LESS compiler:
npm install -g less - Install Sublime Text package: Open Sublime Text, press Ctrl+Shift+P, select Package Control: Install Package. Then find Less2Css package and press enter.
- You should now have this plugin installed. To use it, simply open app.less file and resave it. A new file with the same name but with .css extension should appear in your css folder.
How to change the default skin
There are three different ways to change the default skin:
- Add a reference to your desired skin in page after beyond.css
- Change default colors set in variables.less and rebuild the beyond.less
-
Add a cookie with your desired skin (e.g.
azure).
Note: This way, you need to refresh the page after setting the cookie.
Note: The name of cookie must be exactly the name of the file in/assets/css/skins/.
How to create your own skins
-
Add another file with your desired name in
/assets/css/skins/.
Tip: You can copy one of other skins less files and change it as you want. - Build the file with your prefered colors.
-
If you want your users to be able to change their skins programmatically, you need to add new skin to setting. The code must be like this:
JavaScript customization and highlights of BeyondAdmin
JavaScript Files
Vestibulum id ligula porta felis euismod semper. Curabitur blandit tempus porttitor. Vivamus sagittis lacus vel augue laoreet rutrum faucibus dolor auctor.
| Tag | Description |
|---|---|
jquery.min.js |
latest JQuery minified. |
bootstrap.min.js |
Bootstrap js. |
jquery.slimscroll.min.js |
Responsible for changing scrollbar in all template. |
beyond.js |
All BeyondAdmin related general scripts are placed here. |
Install BeyondAdmin
Install Theme
Here's a brief information about how to install BeyondAdmin from scratch
Install HTML veriosn in IIS
- Use the Seed Project as your starting point.
- Remove unnecessary references from app.less and build your LESS file respectively.
-
Open IIS Manager.
-
For Windows Server 2012, on the Start page click the Server Manager tile, and then click OK. In the Server Manager, click the Tools menu, and then click Internet Information Services (IIS) Manager.
-
For Windows 8, on the Start page type Control Panel, and then click the Control Panel icon in the search results. On the Control Panel screen, click System and Security, click Administrative Tools, and then click Internet Information Services (IIS) Manager.
-
For Windows Server 2012, on the Start page click the Server Manager tile, and then click OK. In the Server Manager, click the Tools menu, and then click Internet Information Services (IIS) Manager.
-
In the Connections pane, right-click the Sites node in the tree, and then click Add Website.
-
In the Add Website dialog box, enter a friendly name for your website in the Site name box.
-
If you want to select a different application pool than the one listed in the Application Pool box, click Select. In the Select Application Pool dialog box, select an application pool from the Application Pool list and then click OK.
-
In the Physical path box, enter the physical path of the website's folder, or click the browse button (...) to navigate the file system to find the folder.
-
If the physical path that you entered in the previous step is to a remote share, click Connect as to specify credentials that have permission to access the path. If you do not use specific credentials, select the Application user (pass-through authentication) option in the Connect As dialog box.
-
Select the protocol for the website from the Type list.
-
. If you must specify a static IP address for the website (by default, this is set to All Unassigned), enter the IP address in the IP address box.
-
Enter a port number in the Port text box.
-
Optionally, enter a host header name for the website in the Host Header box.
-
If you do not have to make any changes to the site, and you want the website to be immediately available, select the Start Web site immediately check box.
-
Click OK.
Update BeyondAdmin to latest version
Update BeyondAdmin
For updating to the latest BeyondAdmin version do the following:
MVC version
- Replace "asset" folder of your project (or any plugin of asset folder that you used) with the one in new version of BeyondAdmin.
- Consider that packages folder of MVC solution is removed in favor of reducing the size of the zip file. Therefor you need to add the packages for first use. Enable your internet connection and just rebuild the solution. Nuget package manager will automatically download all needed packages.
- If you changed Layouts you must consider comparing the new layouts with your changed ones and just commit the changes in your customized files.
- If the syntax or usage of one helpers that you previously used are changed (you can find the changes in Changelog: https://wrapbootstrap.com/theme/beyondadmin-adminapp-angularjs-mvc-WB06R48S4#changelog), you can find your usages and simply replace them with new ones. Resharper is a fascinating tool for doing this.
- If you Updated MvcSiteMapProvider package note that the update process will overwrite the templates in “Views/Shared/DisplayTemplates” Folder. Therefor after updating the package you will not be able to use sidebar menu and breadcrumbs. After updating the package just replace the new templates with original ones in BeyondAdmin source folder.
- From v 1.5.0 you can use either the source of helpers in your project or use the dll from bin folder of the BeyondThemes.Boostrap project.
Asp.Net WebForms Version
- Replace "asset" folder of your project (or any plugin of asset folder that you used) with the one in new version of BeyondAdmin.
- Consider that packages folder of WebForms solution is removed in favor of reducing the size of the zip file. Therefor you need to add the packages for first use. Enable your internet connection and just rebuild the solution. Nuget package manager will automatically download all needed packages.
- If you changed Master Pages you must consider comparing the new master pages with your changed ones and just commit the changes in your customized files.
AngularJs Version
- Replace "asset" folder of your project (or any plugin of asset folder that you used) with the one in new version of BeyondAdmin.
Html/JQuery Version
- Replace "asset" folder of your project (or any plugin of asset folder that you used) with the one in new version of BeyondAdmin.
- Compare markup of the pages if you see something is not displaying right after update.
Landing Pages
- Consider that Video is removed in favor of reducing pakage size. You can replace the video with any video file that you want.
Once again, thank you so much for purchasing this theme.